Обичам цветята, но опитите ми да ги отглеждам на балкона търпят провал след провал. Можете ли да повярвате, че хващат плевели, бели мушици и листни въшки на 4-тия етаж? Останаха ми само розмарин и здравец - устойчиви са на вредители и не трябва да се прибират през зимата. Обичам и рязан цвят, особено малките смесени градински букетчета, които се продават по пазари и тротоари. Сигурно затова едно от нещата, които се опитах да направя от тел, бяха кошници с цветя. Това е първата публикация по темата, а днес ще ви покажа същия модел с малка промяна.
I love flowers but my balcony flower growing is disastrous. Can you believe it they get infested with weeds, white flies and aphids on the 4th floor? The only survivors are rosemary and geranium. They don't get infested and don't need to be indoors in winter. I also love cut flowers, especially those small random mix garden bouquets sold on farmer's markets. I guess, this is the reason I tried to make wire flower baskets. Here is my first post about them and now I'm going to show you a slightly modified design.
I love flowers but my balcony flower growing is disastrous. Can you believe it they get infested with weeds, white flies and aphids on the 4th floor? The only survivors are rosemary and geranium. They don't get infested and don't need to be indoors in winter. I also love cut flowers, especially those small random mix garden bouquets sold on farmer's markets. I guess, this is the reason I tried to make wire flower baskets. Here is my first post about them and now I'm going to show you a slightly modified design.
🌷🌼🌸🌻🌹🍀
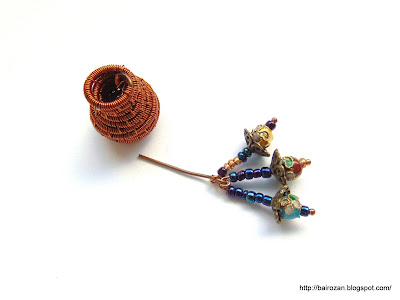
Моите кошници са около 1.5 см високи и с диаметър 1 см. Размерите са въпрос на избор, но трябва да имате предвид, че стават тежички. На снимките се вижда ваза от тел и примерни цветчета. Вазата е само за онагледяване, иначе имам друга идея за нея. Захващам всички цветчета на игла с ушенце и я промушвам през дупката на дъното на кошницата.
I make my baskets about 0.6 inches high and 0.4 inches in diameter. Dimensions are up to you but keep in mind that they end up a bit heavy. This is a wire vase in the pictures that I'm using to visualize my idea, I have a different design in mind for it. Also, there are some sample flowers. Attach all flowers to an eye pin and push it through the hole inside the basket.
От долната страна правя ушенце, което може да се използва за закачане на верижки, мъниста, висулки и т.н.
От долната страна правя ушенце, което може да се използва за закачане на верижки, мъниста, висулки и т.н.
Make a loop at the bottom that can be used to attach chains, beads or dangles, etc.
Push some stringing cord under the uppermost row and under the beaded flower heads. You can make a beaded cord or floating necklace. Whatever design you choose, the beads should be pressed tightly to the basket so that it doesn't turn upside down. Another option is to attach jump rings with chain on both sides of the basket. Even though I liked the eccentricity of the old design, I see this one as more wearable.


I feel that both your hemispherical old baskets and these cylindrical ones are ornate and have their place. I think that adding a chain tassel is a great idea to make sure that the baskets do not turn upside down.
ОтговорИзтриванеPS: Glad to have you back on the blogging front.
Thank you, Divya! Yeah, I somehow missed August even though I have a couple of draft posts (=ideas). I have a craft show in less than two weeks and hopefully will go back to full blogging mode after that :)
ИзтриванеThese are fabulous! I love the baskets and the little bead bouquets in them. So glad to see you blogging again! :D
ОтговорИзтриванеThank you, Hope! I'm glad I'm back, too, I like sharing what I'm up to :)
Изтриване